Search This Blog

Thursday, February 25, 2016

Moving Pains: Jewelry Tips Blog

The last few months, I have been making a lot of changes.  It became apparent last spring that I would need to find a new home for my online store, which also seemed the perfect time to split it up into multiple stores that had a cohesive group of products.  In addition, my old store had my "jewelry tips" blog, which I admit has been neglected lately.

I initially moved the first jewelry tips blog post here on blogger, but then I decided that it might be hard for people to find just that series of articles.  So you may have noticed that my last entry here disappeared.  It has been moved to my website, where the jewelry tips will have a place all their own.


Jewelry Tips: Eye Pins and Wrapped Loops

In the future, you can find it on my website at www.shanghaitai.com.  You can also sign up to receive notifications of future jewelry tips articles by clicking here.

The new website has links to my new stores (which I will tell you about in the next post), news, a calendar of upcoming events, links to some free tutorials and other videos, in addition to the new jewelry tips blog.  I hope you will check it out and I would welcome your feedback in the comments below.


Wednesday, November 4, 2015

Fold Formed Leaves

Well, it's been awhile since I've posted.  I almost dropped off the face of the earth:  I had two partial knee replacements (and also got a new grand-baby and a new daughter-in-law!)  I haven't been going down the stairs to my workshop very much at all.

Meanwhile, here in Indiana we had a dry fall, which made for some beautiful leaves.  Unfortunately, there is no big hill around here that I know of to get a big sweeping landscape picture from.

Trees near my house

My first day that I could drive again, I had to go out and get some shots.  The leaves were at their peak and the rain that was expected that night would probably take a lot of them down.

It seems it always looks better in real life!


I have been wanting to get back into the studio and, inspired by the leaves, I wanted to make some fold-formed leaves.  This is something I've often read about but never tried.  So tonight I made a few.  Here are the results:


I probably went to a lot less trouble than some people.  First I cut out the rectangles with a pair of shears.  Then I folded them lengthwise and smacked them flat with a mallet.  Then I hammered with a textured hammer, especially getting around the edges.  This work hardened them, so they had to be annealed before opening.  Annealing them gave them some nice colors.  The four in front have the colors just from being annealed.  After opening, I filed and sanded the edges so they wouldn't be rough.  Then I flame-painted some more color on the two in the back.

Anyway, next I plan to drill some holes and make them into jewelry.  When I do, I will try and post some pictures.


Friday, July 3, 2015

Blown Away at Covington

Last weekend I was at the Covington Art Fair in Fort Wayne.  My husband always helps me set up, but he was going to be spending the weekend at some Boy Scout activities.  We took separate vehicles, and he only took my sandbag weights.  As I was leaving, I noticed it was starting to rain, so I threw in my pvc pipe weights just to be on the safe side.  It was odd, because I had been checking the forecast all week, and the weather was supposed to be nice.

So Friday night he helped me set up before he left.  We set up my EZ up with Florish mesh panels on three sides and sta-bars at the bottom to hold them, which give extra support.  We put on both sets of weights.  Here is what my booth looked like at the last show that I did:

My booth on a nicer day, in Louisville, KY


At least, that's what it looked like until I decided I got better sales by moving the cheaper items to the front and display cases to the back.  I was excited that I had just ordered three vertical banners with pictures of my jewelry to hang in the back of my booth.

Anyway, normally I set up my display cases the night before.  I had set up the legs and the wooden bases, but that's as far as I got.  My husband was in a hurry to leave, so I decided I would just set them up in the morning.  It rained all night long, and the wind seemed to increase.  I was sleeping in our little trailer, and it was so noisy on the roof I don't think I got any sleep at all.  I checked the radar a few times.  It showed nothing serious (green as opposed to yellow or red) and we were always on the back edge like it was just about over.

About 7:00 am I arrived back at Covington to finish setting up my booth.  As I pulled in the parking lot, I saw a couple of canopies had come down during the night.  This happens sometimes.  I was relieved to see mine still standing along with the others.  I went inside to start setting up.

After putting a couple of rotating displays up on the tables, the wind REALLY started to pick up.  It was scary.  I started holding the tent down, thinking that it will pass in a few minutes.  It didn't.  The wind got stronger and stronger.  Pretty soon water was pouring down on my head as I held on to the canopy leg as hard as I could.  I could hear things crashing outside -- apparently other tents were coming down around me.  

All of a sudden, I heard a siren.  Tornado warning???!!  It's time to abandon tent, I thought.  I was afraid to unzip the door of the tent, because it would let the howling wind in.  So, in spite of needing two knee replacements, I somehow was motivated enough to duck under the side wall.  Before I did, though, I quickly put both my rotating displays on the ground.  I got up next to the building where there is a large awning, and I took this video:


The siren I heard was apparently just a police siren.  I helped my neighbors get their last piece of painted furniture under the roof.  I still wasn't sure that we wouldn't have a tornado.  The roof above, all the way around the shopping center, was glass.  That is definitely NOT a safe place to be in a tornado.  So I went around the mall to see if the artist hospitality suite was open yet, pulling a few artists' possessions up under the roof as I went around.  If my tent was going to go, there was nothing I could do at this point.  I thought it was best to at least get in a building as soon as possible.  

The hospitality suite (an empty storefront) was open, fortunately.  After getting calmed down a little bit from my experience, but still soaking wet, I stepped outside the door and got another video:


Here is a still shot of the view from inside the hospitality suite:


Many of these artists had just lost their tents, and some of them had lost more than that, including their inventory.  They seemed to be taking it all in stride.  Everyone was so helpful to each other.  I finally got enough nerve to go back to the other end of the parking to see if my tent was still standing, and it was, but it was looking a little funny.  One of the cross braces had snapped, and the wind was still blowing.  Some other artists helped me start tearing off the sidewalls so the wind could go through.  As we were doing that, I stopped to take this picture, which shows the broken support hanging:


The table draped in black should be on the right hand wall.  The table didn't move, the tent moved.  The black legs you see sticking in the air are the legs to my display cases.  The green tub on it's side was full of display items, and it's not all that light.  The purple tub still upright is very heavy, and includes my display case glass.  You can see my weights still attached, but tipped on their sides.  My rotating displays, still wrapped in bubble wrap, were fine, though one had been knocked over on it's side.

I was going to text my husband, and let him know that my EZ-up had gone to a watery grave.  However, it was resurrected thanks to a couple of other artists.  Someone suggested that I salvage a crosspiece from one of the many destroyed EZ-ups that were now littering the parking lot along with several more expensive tents. Sarah Thompson, who's tent had blown over from the other side of the lot, was nice enough to give me one, and she and Troy Anderson actually even found a wrench and put it on for me!  

We took the tent down because of the wind.  Someone who counted said there were eight tents left standing.  I don't know if they counted before or after we took mine down.  Anyway, it did pretty good for an EZ-Up!  I read later that there were sustained winds of 50 mph, and gusts up to 70 mph!  The show was cancelled for the day.  After the rain quit, the clouds and wind stayed for several hours.  The whole thing lasted about 24 hours.  The storm just stayed in the same position and just rotated.  Since I was in no mood, or condition, to put that tent up a second time I opted to set up a couple of tables up under the roof next to the stores for the next day.  Many artists went out and borrowed or bought another tent and had it up for Sunday.

I hope I NEVER have an experience like that again.  But it was a learning experience, and here is what I learned:


  1. Weight your tent down good!  
  2. Most EZ Ups fail because water collects in the roof.  Domed roofs are superior, not because they are more aerodynamic, but because they shed water.
  3. If there is a chance of bad weather, don't set up glass display cases, or breakable inventory, the night before.  (Had my cases been set up, I would have lost all the glass.)
  4. If the weather is bad enough, it won't matter what kind of tent you have.  (Of the eight tents that survived, I know that one was weighted down with much hanging metal inventory, and another was tied to a large van that also blocked the wind.)
  5. Strongly consider the need to have at least liability insurance.  (Some tents are destroyed when they are run into by other tents.  When someone finds your tent in their spot on top of their tent, you will be liable.)
  6. I should have set up the tent again!  (It seemed as if I wasn't part of the show, and missed a lot of traffic, but I will know better next time!)
  7. Artists are a caring, helpful community!
In closing, let me say I was very fortunate because, assuming my lights and inverter dry out, I did not lose anything.  Many other artists were not so fortunate.  I am really hoping my next show is NOT a learning experience.  I've learned enough for awhile, now I just need a good show!


Thursday, May 7, 2015

Strategic Planning #2 - My Target Market

Well, my week at French Lick is almost over, and I have identified my target markets!

I knew that my jewelry, depending on the type, appealed to different people.  For this reason, I have been planning to split it into different online venues.  I just wasn't sure how to split it up, or which jewelry to put on which venue.  So I have been doing a lot of research online.  There's no point in wasting time and resources marketing to people who are not interested in what you are selling.

First you have to make a detailed list about the type of customer who buys your products:  Age, sex, race, income level, marital status, education, hobbies, etc.  I found this very hard to do.  But once I split up the types of jewelry I offer, then it wasn't so hard.

Apparently you should pick two main attributes of the customer, and one to three secondary attributes.


Flip Flop cultured pearl and sterling silver bracelet
For example, my target customer for a pearl necklace or bracelet is probably a bride.  Did you know the average age of a first time bride is now 27 years old?  So my target market for pearl jewelry is females between the ages of 25 and 30.  One of the secondary things would definitely be brides-to-be.


Abstract Bamboo Pendant, Fine Silver and Dichroic Glass


But this is not true for all the jewelry I make.  For example, my target customer for a one-of-a-kind fine silver and dichroic glass pendant is probably a married woman (or her husband) with a fairly high income level.


After listing all the attributes of your ideal customer, pick the two that best define him or her, along with up two three lesser important attributes.  You want to target your marketing to this person.  This exercise has been very helpful to me.  First of all, now I will be able to design my online stores to appeal to my different markets.  Not only that, I can use social media to target the appropriate customers for each shop.

If you haven't identified your target market yet, what are you waiting for?  I am sharing some of the articles I found helpful below.


How to Define Your Target Market
Find Your Target Market
How to Define Your Target Audience
How to Find Your Target Market


Sunday, May 3, 2015

Rest, Relaxation and Strategic Planning #1

I am hanging out in French Lick Indiana this week, communing with nature.  We had a timeshare week expiring, and my husband didn't want to use any vacation.  So he said, why don't you just go down to French Lick?  Some of you may know, I am a tax CPA.  I recently saw my doctor, and he made a comment, something to the effect of, "wow, you really let yourself go during tax season!"  It's true.  So I thought, why not spend a week just relaxing and trying to get back in touch with my creative mojo.  I also need to do some serious strategic planning for my handmade jewelry business.

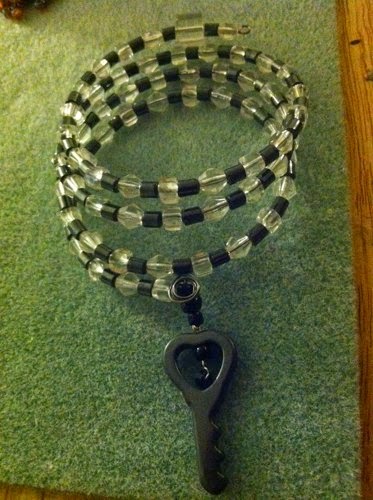
So here is my creative home base for the week:


Friday night, when I arrived, a couple of ladies arrived next door and were having a little trouble getting their friends to hear them knocking on the door.  They all came from the Chicago area, and invited me over for drinks.  (Shout out to Betty, Linda, Marlene and the three Karens!)

I was starting to wonder if I would get anything done this week,  I didn't bring any jewelry to work on, because this week is about planning.  Some of the questions I have to answer are:

  • Who is my target market for which type of jewelry?
  • Which venue is appropriate for which type of jewelry?
  • Who buys jewelry on which venue?  (Etsy, Artfire, Storenvy, Aftcra, etc.)
  • How do I get in touch with my target market?
  • What display to use in my art show booth in addition to the display cases?
  • What possible themes could I use for next years jury photos?

Yesterday was day one, and I have made some progress.  (Also this morning I came up with a great idea for a video!)  After doing a little research online, I have learned this:

  • People of ALL ages shop online
  • Younger people spend more money online than older people
  • Men spend more online than women
  • Women tend to buy expensive jewelry as a gift, but not so much for themselves.

I will try to post updates of my progress using the painfully slow internet here.  But now it's time for my brain to change gears, so I will leave you with a video.  Not so much the video, but the audio is of all the birds singing outside my balcony even though I am right in town.  You may have noticed my ipod speaker in the picture above.  I turned it off just to enjoy all the racket the birds were making.  I hope you enjoy it too.


Sunday, January 25, 2015

Booth Shot for the Art Show Jury

Yesterday I spent pretty much all day long working on my booth shot.  Those of you who enter juried shows know that you usually have to submit three pictures of your work and one of your booth.  Sounds easy enough, but it's far from it.  You can't just take a shot of your booth at a show.  Your booth doesn't even necessarily have to be set up in the same layout as a show.  At a show, you set your booth up for the flow of traffic through your booth.  Here you are setting it up so the jury can see it.

If you are reading this as a novice, first of all let me say your tent/canopy must be white.  Most people go to Walmart and buy a cheap one for their first craft show.  They're always some color other than white.  Soon after they always end up having to replace them because almost all art shows require white canopies.  Last fall I happened to score some used Flourish mesh panels for my EZ Up.  (EZ Up gets a bad rap sometimes, but my EZ Up has held up where other, more expensive tents have not.) These panels not only help stabilize the tent, but you can also hang things from them.

Since I have some jury photo deadlines coming up at the end of the month, I have been watching the weather closely.  It has been really cold, and we have had snow on the ground.  Yesterday was my big chance.  My husband, who is the muscle, starting setting up my EZ Up in the morning, and I put in the floor and the display cases.  He had set it up in the driveway, with the door facing the house.  Actually a pretty good idea, I thought, because it's much more secure when I set all the jewelry out.  

What I failed to consider was the location of the sun.  Actually it wasn't that I didn't consider it, I just thought it wouldn't matter inside the tent.  I was wrong.  It was supposed to be cloudy, but by the time we were set up, the occasional cloud that came by was higher in the sky than the sun was.  Up north in the winter, the sun is low in the sky to the south from sunrise to sunset.  Our driveway pretty much faces south, which means the back of my tent was to the sun.  I never realized that the tent does not really block out the sun.  Here is my first shot:


Ok, this looks awful.  I know it.  And it looks even worse in the photo than it does in real life!  You can't see it, but I am shooting right into the sun.  Would you go into this booth?  Probably not.  By the way, this is also the spare EZ Up that came with the sides.  It isn't as clean as my regular one, and you will notice that when it is fully up, the side walls don't reach the ground.  That's ok, because I can fix that in photoshop.  

We have only two of the Flourish panels up, in the rear and the right hand side.  I was planning on hanging a couple of displays on the panels, but once I saw the size of the holes I knew it wasn't going to work.  That's ok, I have a plan B, but it wasn't going to be ready before the end of the day.  No big deal.  This is why you always set things up before you use them, so you don't get any surprises on show day!

My next step was to upload the picture online and get some advice from some other jewelry artists.  Based on their advice, we moved the display cases so they were staged for the picture.  They also suggested I add a rug.  Now I have seen these big rugs, and I have no intention of hauling one of those around.  My husband said he knew of a rug that had just been sitting around in the basement, rolled up since we moved (years ago.)  So we added it.  

After we got the feedback and made the changes, the sun was beginning to go down, and the lighting totally changed.  My DSLR camera was on a tripod, and I put it on a self timer so that there will be no motion from me clicking the shutter button.  That way it can do a long exposure if it needs to.  Here is the last picture I took before editing:


The improvement is amazing.  All we did was rearrange the cases and add the rug.  But the lighting is also a huge improvement.  I love how the rug adds some color, and it's small enough that I can take it to shows.  By the time we got this done the light was fading fast, so this one will have to do.  Here is the final image after cropping and editing:


That is a booth I would go into!  Before next year I hope to add some sheer curtains in the corners to hide  the poles, and three large jewelry photos across the back of the booth.  For now it will have to do.  But we certainly hit the "sweet spot" in the weather because today, as you can see, we got more snow:


For those of you contemplating your own booth shot, I will leave you with a link to Larry Berman's article on the subject:  http://bermangraphics.com/artshows/photograph-booth.htm

Monday, December 1, 2014

A Clasp To Hold It


One  of the great things about handmade jewelry is how an artist can give a unique twist to certain components of a piece.  Often that is a clasp.  There are many different kinds of clasps, and when it comes to handmade jewelry, you can find some interesting twists (both literally and figuratively.)

Clasps are sort of the "unsung heroes" of a piece of jewelry, because, after all, they do the work of holding the piece together!   I decided to go looking through the Artfire shops of the Jewelry Creators United in Numbers (JCUIN) guild and see if I could find some clasp inspiration.  


Wire Wrapped Malachite Bracelet, Artisan Station Chain Handmade Clasp
Spring loaded clasp, handmade by Boho Wire Wrapped
Rodochrosite and Sterling Silver 4 Stone Link Bracelet brchk2239
Toggle clasp by Lunar Skies

The idea came to me earlier today when I happened across this incredible clasp.  Sadly, Margaret of Boho Wire Wrapped is no longer with us, but this clasp shows just a bit of her amazing wire-wrapping skills.  Her family is keeping the shop open to sell what remains of her wonderful wire-wrapped treasures.


The toggle clasp is very common in handmade jewelry.  Most of them are purchased.  What makes this one special is that it looks slightly different and I'm pretty sure that Quentin of Lunar Skies made this one himself.  


Leather and Gemstone Bead Wrap Bracelet Lemon Jade Celtic Button Clasp
Button clasp, bracelet by Pink Sunset Jewelry Designs


While this clasp is not handmade, it is a nice adaptation, and a way to recycle an odd, lone button.  This bracelet, by Pink Sunset Jewelry Designs, is a great example of a button clasp.  These are especially popular in wrap around bracelets like this one.


Mother of Pearl Swirl Pendant on Kumihimo Braided Necklace
Sprial clasp by Meant 2B Cherished (M2BC)


Here is an example of one of the many spiral type clasps that wire wrappers love to do.  These clasps are simple, elegant, and unique because each one is made by hand.  This necklace is by M2BC (Meant 2B Cherished).  Finding this was a pleasant surprise, because it is a departure from her usual fused glass pendants (which are also pleasant to be sure!)


Argentium Silver Byzantine Bracelet
Hook and eye clasp by Wagoner Wire Works
Now we've all seen hook and eye clasps, they're fairly common.  Some are handmade and some are store bought, mass-produced.  This one, by Wagoner Wire Works, is handmade.  It is also unique in that the eye part has a sort twisted and hammered look to it.


Oak Leaf Toggle Designer Clasp .925 Sterling Silver Handmade in U.S.A.
Sterling leaf toggle clasp by Shanghai Tai

There are many variations on the basic toggle clasp, including geometric designs, flowers, leaves and animals.  Most are cast and store bought.  Here is a handmade toggle clasp from Shanghai Tai with an oak leaf motif.


Thank you to the members of the JCUIN guild on Artfire for providing the inspiration for this blog.  I know looking at clasps inspires me to be more creative with mine.  So I hope next time you are looking at a piece of jewelry, you will notice the unsung hero, the clasp.


Friday, October 31, 2014

In the Studio video

Just finished a new video.  I have been wanting to do something like this to take to shows so people can see a little bit of how I make things.  Of course, I just used some pictures that I had on hand.  Anyway, here it is:


Friday, September 26, 2014

Jewelry Photos for Collections

It's true, I am not a professional photographer.  The impetus for this post is the fact that I do collections on Artfire.  They are a great way to promote your work, because the people featured in the collection will promote the collection on social media.  If your collection is good, you may be lucky enough to see it on the front page of Artfire, or in the Artfire daily email.  The same can be said for Etsy treasuries.  Sometimes I see an item that I would really love to include in my collection but I can't because it's out of focus, too dark, too cluttered, etc.

When I do a collection, it always has a theme.  Once I choose the theme, I go looking for items that fit that theme.  I want to be able to clearly see the item, in focus, and not anything else that might distract me from the item.   One of my big things is cropping, because those photos are soooo small, the item needs to take up the space.  So, even though I have done this before, I thought I'd see what I could do with a few photos and my Photoshop.  I use version CS2, which is a public domain version, so you can get it for free.  There are many other programs available also.  So I took a few items from the Jewelry Creators Unite in Numbers (JCUIN) guild.  I hope none of you mind that I edited your pictures, and if you would like a copy, let me know.  I am purposely showing small pictures here because that is what you see in a collection.
original

First is a pair of beaded earrings from Shirley's Nook and Cranny.  Here is the original photo, right.  I like the color combination of the earrings, but I think the picture is a little dark.  Also, maybe it's just me, but those dark corners drive me nuts!  I wanted to brighten it up a bit, but since I had so much going in the background, I decided just to drop the background out of it.  (That was a lot more work than I bargained for because of those little sparkly bits in there.)
edited

Here is the edited version at left.  After I got the background out, I made it square.  (More on why later.)  Now I know about the rule of thirds in photography, and it is a good rule.  However, when you have a little thumbnail of an image, I think you want to make maximum use of your space.  So I rotated the image to take up more of the canvas.  I also brightened it up and put in a slightly graduated background.  (A plain white background would have been fine too.)


original
This next one I really didn't do much to.  It is a bracelet from Plethora of Jewelry.  I like the organic look of the stones.  I also like the composition, and the fact that it wasn't shot from straight over the bracelet.  The lower angle makes gives more dimension, or depth to the image.  The problem, as I see it, is the very harsh shadows caused by bright backlighting. The back of the beads are lit up nicely, but the fronts are in such shadow that you really can't see them well.  
edited
I couldn't really fix this one as well as I would have liked.   What I did was use the highlights/shadows tool to brighten the shadows and darken the highlights.  This gives it less contrast (it doesn't "pop" off the page how I like it to.)  But you can see the beads better.  I also used the spot healing brush tool to get rid of a few little lint or cat hairs that you can see in the original.  Fabric always runs the risk of getting linty, but some are much worse than others.  You don't notice it when you take the picture, but when you blow it up on your computer screen, there it is larger than life!!

original
Here is a stunning pendant by Artistic Creations by Rose.  The original photo is at left.  In a thumbnail, it's hard to see the pendant because of all the other things in the picture.  The subject is only taking up about 1/9th of the image even though the photograph itself looks great.  The border might keep it out of a collection on things that are round, multicolored, etc.


cropped
Basically all I did was crop this one, so you can more easily see the beautiful pendant.  I may have upped the contrast a bit, because I just can't resist doing that.  Now the pendant is the center of attention.  I would love to put this photo in a [round, spiral, twist, fiery] collection, wouldn't you?


original

 Now more on squares.  Here is a pendant necklace by Joyce's Custom Gems.  As you can see, it is a vertical picture because she is trying to show the whole necklace.  People do want to see the whole thing.  If you show a vertical image, however, you don't want it to be your very first picture.  The first image is automatically cropped into a square thumbnail, which is the first thing your customers see.  In this case, it actually crops out part of her pendant, but leaves the entire chain.

edited
Here is her image cropped into a square (and brightened up), so that when you are on her main page you can see the entire pendant.  You can also still see the little fish accent as well.  Then if a person wants to see more, they can click on the second (original) photo to see the entire chain.


original
Lastly, here is a bracelet from Tearis's Art Gallery.  This one also results in the very bottom of the key getting cropped out of the thumbnail, but I didn't want to drop the background of of this one too.  The main problem is that it's so dark.  Also the fact that the image goes off of the background causes some distracting edges.

edited
If I really wanted to put a lot of effort into this, I would drop out the background, drop the image into a square canvas and rotate it like I did the first pair of earrings.  But in this case I wanted to show you what a difference it makes when we just brighten it up.   I used the shadows/highlights option and then the brightness/contrast.  Then I couldn't resist using the clone tool to copy and paste little sections of background over those distracting edges.

I hope that you guys don't mind that I messed with your photos, and I hope you like what I did.  Of course, it's better (and a lot easier) to do these things with the camera than trying to edit it later.  Sometimes it's easier just to re-shoot it.  And one thing that must be done with the camera is to get your pictures in focus.  Some of these pictures are very low-resolution (small files) so that is another reason for keeping the pictures small here.  Beginning in October 2014, it's my understanding we will all have the zoom feature on Artfire, so that's another reason to shoot some higher resolution photos.


Tuesday, September 23, 2014

Volunteering at the Gallery

The other day I spent the afternoon volunteering at the gallery, so I took some glass cabs and wire along with me.  With all the pendants sitting there, I just had to take a picture, so I thought I'd share what I got accomplished:


These are all either copper, Argentium sterling, or gold filled.  Now I just have to photograph and list them.


Thursday, July 31, 2014

Boho Chic Jewelry


Years ago, when I first heard of "boho chic", I didn't really know what it meant.  But after seeing the word used a few times, I got the idea.  At some point I went and looked it up to see if it actually meant what I thought it did.  According to Wikipedia, boho chic is a style that draws on "various Bohemian and Hippie influences."  It defines Bohemianism as "the practice of an unconventional lifestyle."  


A busload of hippies.
Get a haircut you damn, dirty, hippie!

Now, no one needs to define the word hippie for me.  I was a child during the 60's, and I know (and love) the hippy look.  But for those of you who don't know, it was a lifestyle back in the 60's.  To say it was a subculture may be an understatement.  I think it was an entire generation.  Think pot, LSD, psychedelic music, psychedelic clothes, flower power, love beads, peace signs and fringe.  I think probably what started it was the reaction of young adults to the Vietnam War, but it spread to other countries as well.  It reached it's peak in the Haight-Ashbury district of San Francisco in the late sixties.


Janis Joplin

Of course, rebelling against the war doesn't entirely explain the fashion style.  Part of the fashion was definitely rebellion.  Men grew their hair long and didn't shave.  The natural look was certainly in, which was pretty much the total opposite of the early 60s.  Another influence was when the Beatles went to India to visit the Maharishi.  Add psychedelic drugs to the mix and stir it all together and you have hippie fashion.  Now, I'm just speculating at all of this, so if anyone wants to correct me, feel free.  (I'm too lazy to do the research!  Oh, did I say lazy?  I mean busy!)


The Beatles and the Maharishi - notice the beads!


Brown Cotton Macrame Bracelet with Rhinestone in Silver
Bracelet by Pink Sunset Jewelry Designs
The hippie jewelry was not expensive.  I'm sure quite a bit of it was homemade.  Macrame was in for plant holders and jewelry too.  


This macrame bracelet looks very much like something a hippie might have.  Although the large rhinestone might be a little on the fancy side.  A hippie might be more likely to have one or more 
cheap colorful beads.
Om Raku Pendant Necklace Handmade Jasper Gemstone Swarovski Jewelry
Necklace by Shadow Dog Designs

I still remember the necklace I used to wear all the time.  I had a yellow shirt and the pendant was orange.  It was round.  It may very likely have been a peace sign.  I'm sure I still have it packed away in a box somewhere.  Even though this one isn't a peace sign, the om would fit right in too (reminiscent of the maharishi!)


Triple chain charm anklet
Ankle Bracelet by Joyce's Custom Gems
We've all heard how hippies didn't like to bathe.  Actually I'm pretty sure that, even though they may not have had a bathtub, they did like to go skinny dipping!  They didn't necessarily like to wear shoes, or even any clothes at all.  That's why I couldn't resist including this bare foot with the ankle bracelet here.


Boho Beaded "Jesus Saves" Inspirational Wrap Bracelet
Bracelet by Allen Designs by Michelle
This bracelet looked hippie to me because of all the different beads that have been incorporated with one focal piece.  Like, yeah, I've got a bunch of beads, so let's throw them all together! (No offense, it looks great!) Although a true hippie would have a peace sign for the focal piece.


Filigree Earrings Boho Chic Gold Pearl Iris Crystals Niobium Ear Wires
Earrings by Shanghai Tai

Long and flowing is definitely a hippie mantra, especially when it came to hair.  "Let it all hang out!"  Dangling and eclectic, these earrings would fit in at the commune.  Even though these pearls are very organic looking rather than expensive, a real hippie probably would have some kind of bead other than a pearl.  These have a bit of a gypsy vibe, which was definitely "in".


Silver Lined Teal Tube Beaded Chevron Patterned Dangle Beaded Earrings
Earrings by Specialtivity
Ok, now for the pièce 
de résistance, in my opinion:

FRINGE!  

As I was looking through fringed, seed beed earrings for a pair to include it was almost like I went back in time for a second.  I remember the pair I had.  They were kind of grey, and I think all one color.  This pair looks a little nicer than mine.  Mine were really cheap, and I'm sure they were made in Japan.

What happened to the hippies?  The war ended and I guess they all grew up.  I like to think there's a little hippie still left inside all of us.    I don't know about you, but this has certainly inspired me to go dig out some hippie clothes and see if I can find my old jewelry!


Sunday, July 27, 2014

Peculiarities of Pearls


If you know me, you know that I love pearls and make a lot of pearl jewelry.  So I am going to share with you a few of the many,  many different kinds of pearls that are out there. 


Real Pearl wire on a sterling silver Heart

Sterling silver ring by Zoomgraphik

But first, a little about the two basic kinds of pearls:  saltwater and freshwater.  Pearls are formed when an irritation gets inside a mollusk (an oyster or a clam).  If the pearl comes from a mollusk that lives in saltwater, the pearl is a saltwater pearl, also known as a sea pearl.  Freshwater pearls come from mollusks that live in freshwater. 


Near Round Freshwater Pearls - Bracelet by Diane's Dangles


Salt water pearls tend to be larger and rounder than freshwater pearls.  Sometimes they also may be round with a little point on top.  Tahitian, South Sea, and Australian pearls are all types of saltwater pearls.  They will naturally come in white, dark silvery grey/peacock grey, pale pinks or even gold.  


  Freshwater pearls tend to be smaller, on average, than the sea pearls.  They also often have kind of a squashed shape, more rice/oval shaped, or almost round but a little squashed on the bottom.  Freshwater pearls are much more affordable than saltwater pearls, so you see them much more frequently in handmade jewelry.


This shows the typical "squashed" look common in FW Pearls


A natural pearl is a pearl that is found naturally in the wild.  A cultured pearl means that the mollusk was induced by man to produce the pearl by inserting a nucleus, usually made from a small piece of shell.  Natural pearls are very rare, so almost all pearls available are cultured pearls.  The most prized shape is perfectly round, even though most pearls are not perfectly round. 

Pearl Hoop Earrings, Hoop Earrings,  Dusty Mint Green, Hemlock

Pearl Hoop Earrings by Maggie's  Jewelry


A pearl that is not round is called baroque.  In recent years, producers of freshwater pearls have taken to using various different shapes of nuclei resulting in some unusually shaped pearls, including diamonds, coins and crosses.  

"Mystère" - Ivory Freshwater Pearl and 14k Gold-Filled Earrings
Center drilled coin pearls, earrings by Adora by Simona

In addition, freshwater pearls are often dyed or irradiated to give them various colors.  They naturally come in a white to a pale peach color.

Twisted Pearl Handmade Necklace Torsade Green Peacock Seafoam Celadon

Freshwater pearl necklace by Shadow Dog Designs


Many pearls are drilled all the way through, and then strung temporarily on strands that are very closely matched.  Some pearls are what's called half-drilled, drilled only half way through so they can be mounted on a post.  


Half drilled freshwater drops by Shanghai Tai

The highest quality (and most expensive) pearls are perfectly round, perfectly white, have no visible flaws or grooves, and a very high luster.  However, pearls with flaws can also make wonderful jewelry, because they look very organic.  
Freshwater Pearl and Green Glass Earrings with Leaf Charms

Baroque Pearls, earrings by Pretty Gonzo


If you would like to learn more about pearls, you might enjoy this video I found which really goes into a lot of detail:   Japanese Cultured Akoya Pearls Part 1.